Some of the links in this article are affiliate links. This means that I may get paid a small commission if you click on the link and make a qualifying purchase. There is no additional cost to you and the small commission I earn helps support my blog.
My one and only niece was baptized earlier this year and my husband was asked to be the godfather. I knew I wanted to make something extra special for her that would remain a keepsake for her as she grows older.
I had only recently discovered the world of beautiful handmade rosaries on Etsy around this time, thanks to some targeted advertising on Instagram. I had never really thought about where or how rosaries were manufactured prior to that discovery, or that the option of making them even existed. After realizing that a whole niche of artists do actually craft them, I instantly knew designing and constructing one would be the perfect gift.
Making jewelry and working with wire is actually something I did quite a lot as a child. My Aunt had gifted me a huge box of miscellaneous charms and jewelry making supplies when I was in grade school. Being the crafty person I am, many hours were spent making charm bracelets and trying my hand at all sorts of jewelry making techniques. It's been at least a decade since I attempted to make anything with wire and beads, so this was a project I was excited to dig into and brush off my old skills.
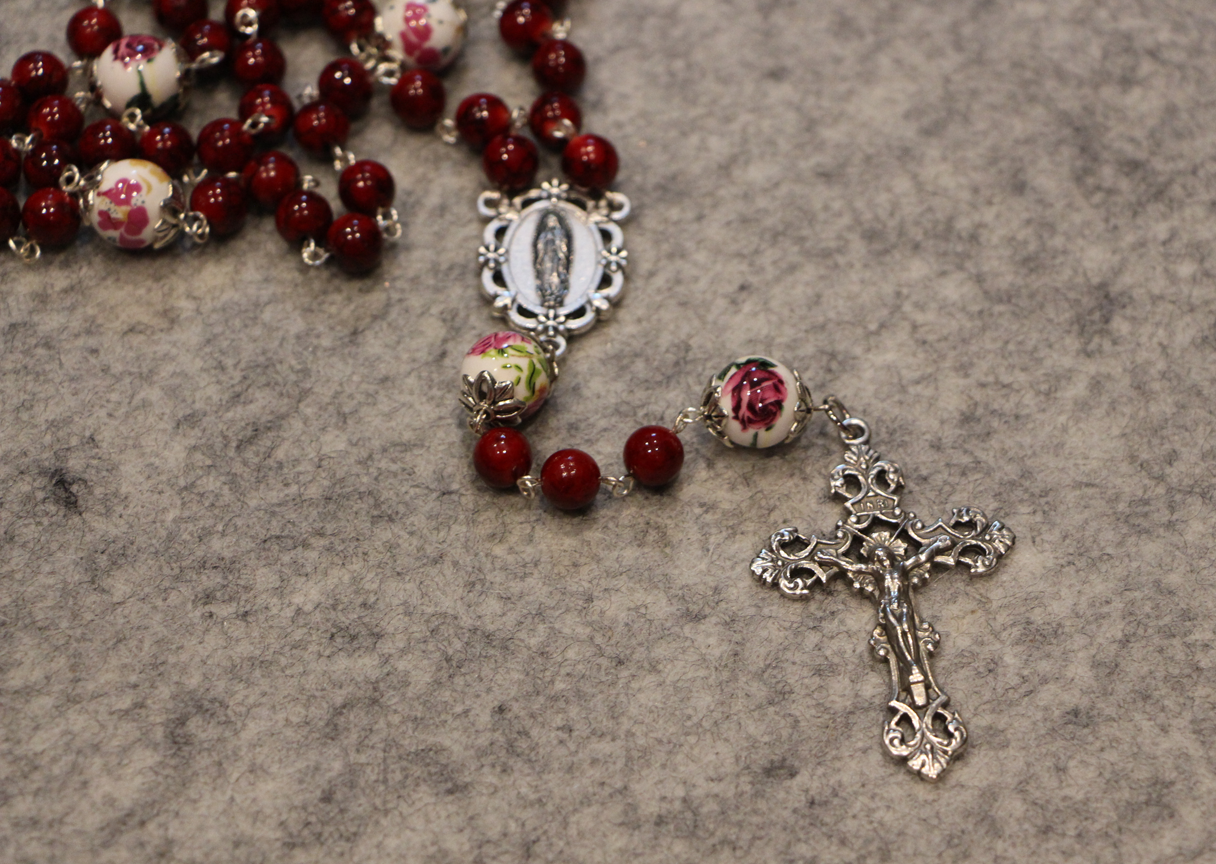
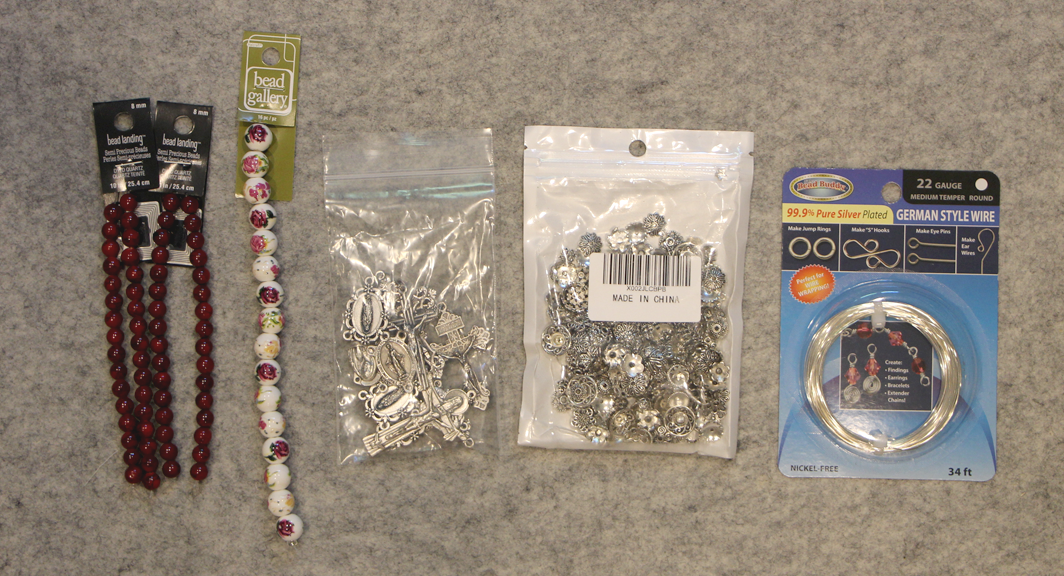
To get started, I purchased a variety of crosses and pendants from Etsy, then browsed online and in-store for the perfect set of floral beads. I ultimately decided on larger printed porcelain accent beads, with smaller natural stone beads for the main decades. I also bought some bead caps to decorate the accent beads for a more ornate aesthetic. (Make sure the bead caps are the right size for your beads!)
I also used 22 gauge wire, which I found to be the perfect durability while still being easy enough to twist and bend.
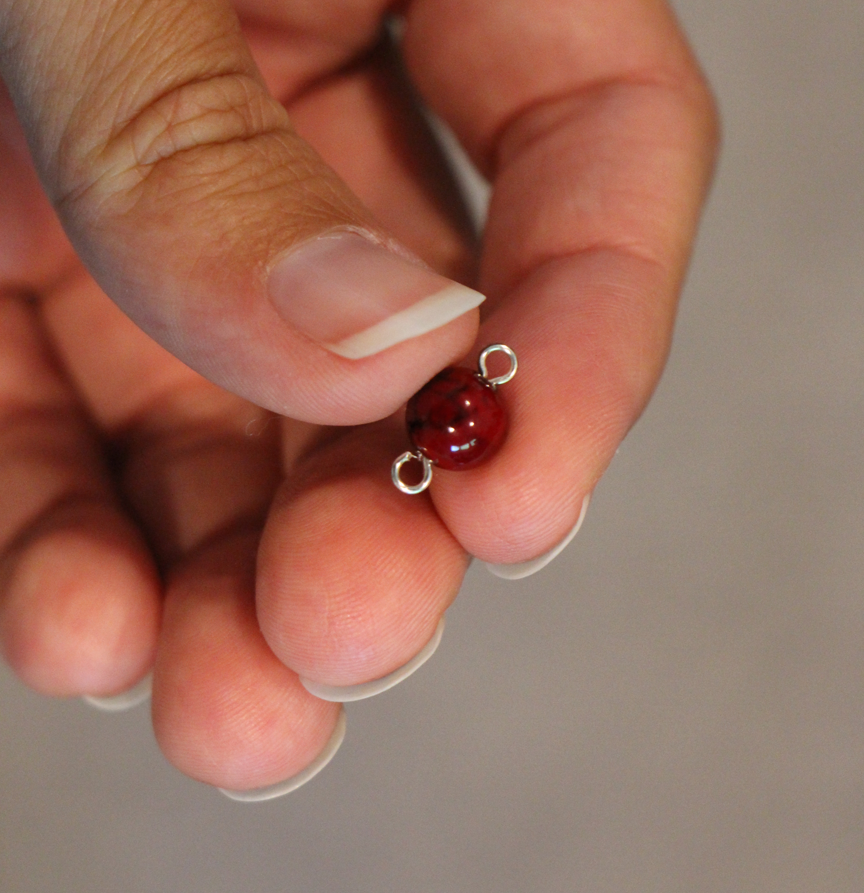
Each bead then had to be added to wire with loops on either side that could be chained together. I could have built each section as I went, but instead decided to embrace the repetition of completing all 53 beads individually. It would be easy enough to join them together afterwards. I actually found the process very meditative and enjoyable! I took them on vacation with me and it was a nice project to keep my hands busy while chatting with family and playing games.
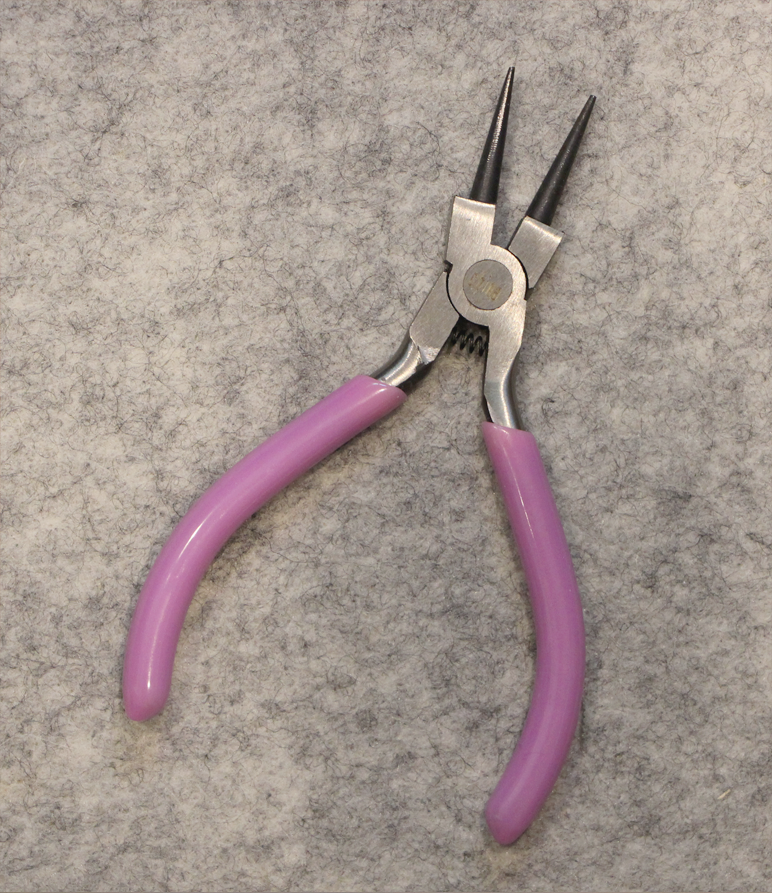
They key to making these loops is using the right tool. It's important to have a set of round nose pliers, also known in the jewelry world as rosary pliers! The rounded prongs are perfect for creating uniform sized loops around the beads.
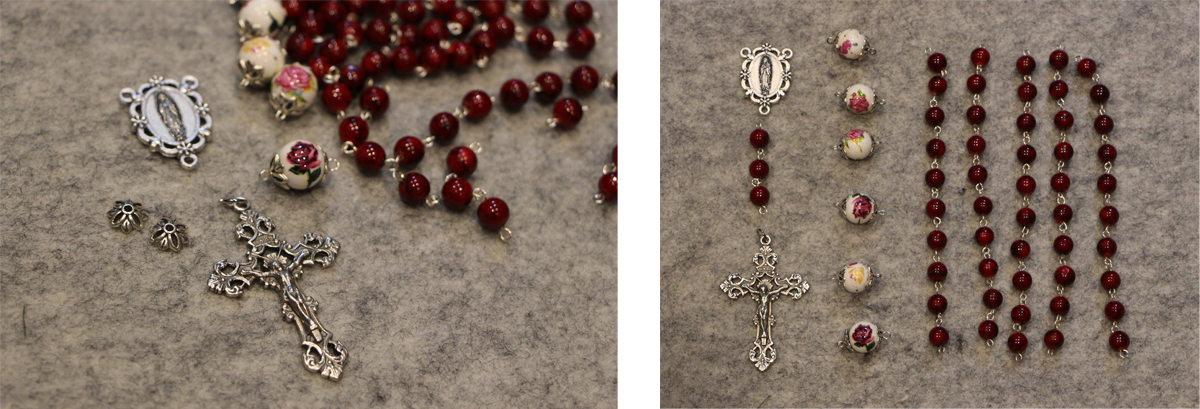
Once all the components were ready, assembling was very simple. I made 5 strings of 10 beads and 1 string of 3 beads. I added loops to the 6 accent beads, being sure to add bead caps to either side as well. The loops were opened and closed to join all the components together, including the pendant and cross.
I was actually surprised at how quickly and easily this project came together! ...I also found myself saddened when it was over; the monotony of adding wire loops to the beads was really relaxing, and I was reminded of the enjoyment that I get from making jewelry. I may already have been thinking about designs and plans for making them for each of my own children too!
I think the end result is so beautiful, and I really hope that it inspires wonder and interest as my niece grows in faith!